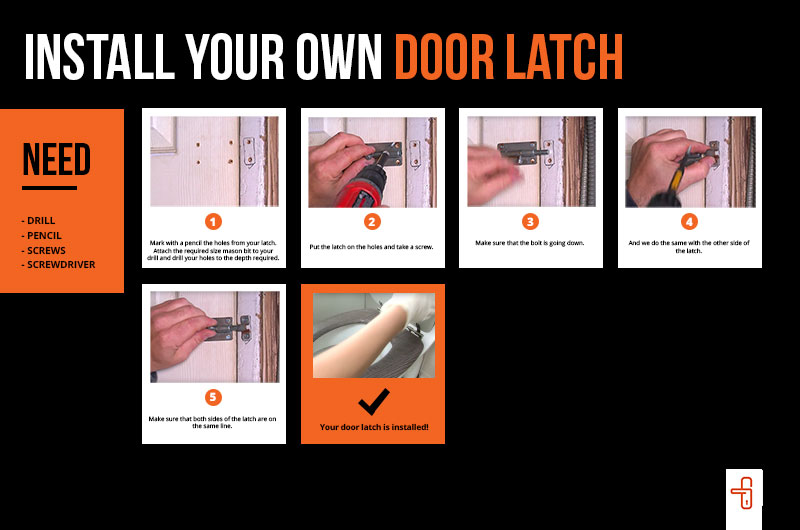
Hello folks, thanks for joining us again in our step by step guide to installing your own door latch. First of all, we’d like to thank Woodie’s TV again for helping us create a more visual guide by providing the images. All the tools you will need and steps required to fit the new latch is in the image below (click on the image to see the full image), but just in case, we’ve included a more in depth guide below:

Things you will need:
– Drill, Pencil, Screws (provided) & Screwdriver
1. Make with a pencil the holes from your latch. Attach the required size mason bit to your drill and drill your holes to the depth required.
2. Put the latch on the holes and take a screw.
3. Make sure that the bolt is going down.
4. And we do the same with the other side of the latch.
5. Make sure that both sides of the latch are on the same line.
6. Your door latch is installed!
If you require a door latch, we have a ton available here: Door Hardware. We have a range of Door Latch Sets to choose from and tailored to any design you require.
For more DIY Guides, and infrequently pleasant updates, please like and follow us on Facebook & Twitter. We are also on Pinterest, with hundreds of DIY pins and projects for you to gain inspiration from.


